# SignalFx
Splunk Observability Cloud (formerly SignalFx) is a real-time infrastructure monitoring and alerting platform designed for cloud-native environments. It uses detectors to evaluate metrics against defined conditions and can notify external systems via webhook whenever an alert fires or clears — making it straightforward to route those alerts into ITOC360.
### In ITOC360
Go to Sources, click **Create Source**, and select **SignalFx** from the list. Once the source is created, copy the webhook URL and token from the source detail page — you will need these when configuring your detector.
### In Splunk Observability Cloud
#### Step 1 — Create a Detector
In the left sidebar, click **Alerts**, then select **Detectors**. Click **Create detector** in the top right corner and select **Custom detector** from the dropdown.
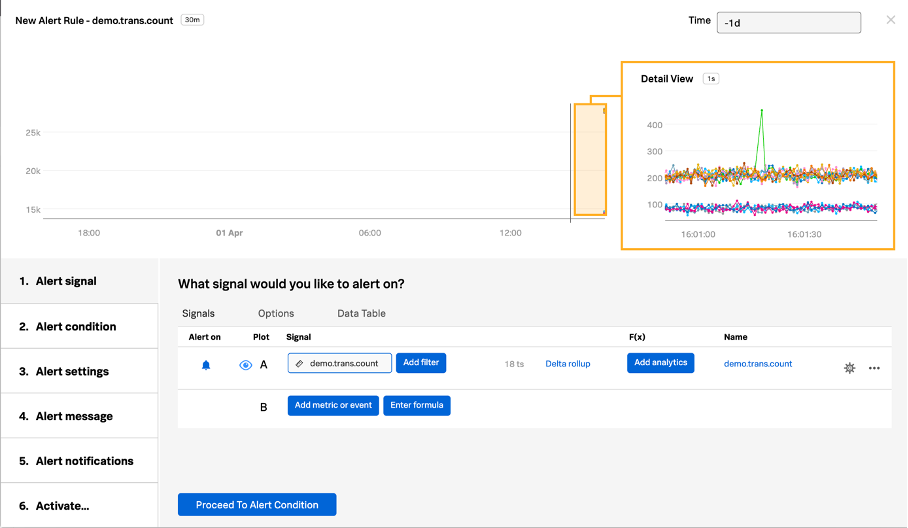
In the **Alert signal** step, enter the metric you want to monitor in the signal field. Use the **Add filter** button to narrow the signal down to a specific host, datacenter, or dimension — this keeps each alert tied to a single incident and makes resolution tracking reliable.
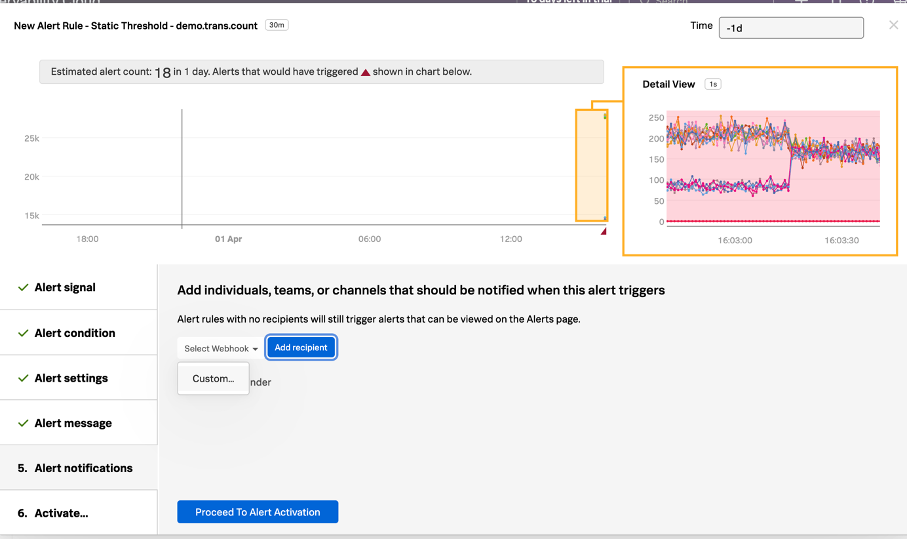
Work through the remaining steps — set your alert condition, configure alert settings, and customize the alert message as needed. When you reach the **Alert notifications** step, click **Add recipient**, select **Webhook** from the dropdown, and then click **Custom...**.
#### Step 2 — Configure the Webhook
In the **Webhook Notification** modal that appears, paste your ITOC360 webhook URL into the **URL** field, appending your source token as a query parameter:
```
https://?token=
```
Leave the **Shared secret** field empty. Click **Update** to save the webhook.
Click **Proceed To Alert Activation**, give your detector a name, and click **Activate**. The detector will immediately begin monitoring the signal and send notifications to ITOC360 whenever the alert condition is met or cleared.
***
### Notes
* Splunk Observability Cloud sends a separate notification for each unique dimension combination that matches your signal. If you want a single alert per detector, use the **Add filter** option to target a specific host or instance.
* Alerts are automatically resolved in ITOC360 when the detector sends a notification with `statusExtended` set to `ok`, `manually resolved`, or `stopped`.
* The **Shared secret** field in SignalFx is used for HMAC-SHA1 request signing and is separate from your itoc360 source token. You do not need to fill it in for ITOC360 to work.