# AppDynamics Integration
### Overview
AppDynamics provides deep application performance monitoring (APM) and infrastructure visibility.
To integrate AppDynamics with our platform, we use an HTTP Request Template. Instead of sending AppDynamics' default complex payload, we use Velocity Template Language (VTL) to extract only the necessary variables. This formats the outgoing webhook to perfectly match our Event ➔ Alert ➔ Incident workflow.
### Provider Configuration & Mapping
AppDynamics sends event severity as `ERROR`, `WARN`, or `INFO`. We map these specific text values to our platform's internal priorities.
Priority Mapping Config:
JSON
```
{
"priority": {
"field": "$.Severity",
"options": [
{ "value": "ERROR", "label": "Error" },
{ "value": "WARN", "label": "Warning" },
{ "value": "INFO", "label": "Info" }
],
"mapping": {
"ERROR": "CRITICAL",
"WARN": "MEDIUM",
"INFO": "LOW"
}
}
}
```
Correlation (Fingerprint): We use `$.IncidentNumber`, which pulls from the AppDynamics `${latestEvent.id}`. This unique ID allows our platform to track the alert and automatically resolve it when AppDynamics sends a recovery signal.
### Setup Instructions
#### Step 1: Get Your Webhook URL
1. Log in to your alert management platform.
2. Go to Sources → Add Source.
3. Select AppDynamics as your provider.
4. Save the configuration and copy the generated Webhook URL.
#### Step 2: Create the HTTP Request Template
1. Log in to your AppDynamics Controller.
2. From the top navigation bar or left menu, click Alert & Respond.
3. Click HTTP Request Templates.
4. Click New to create a fresh template.
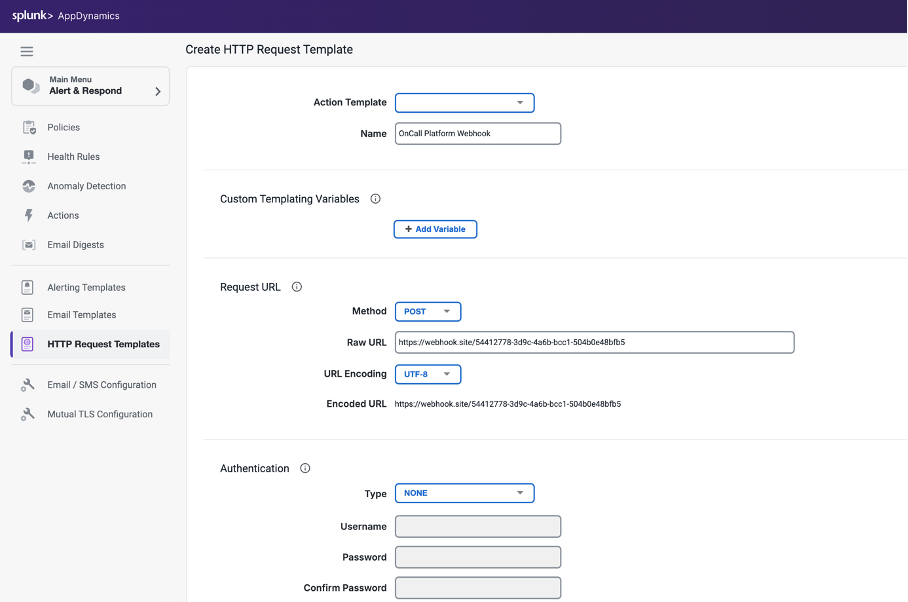
#### Step 3: Configure the Request Settings
Fill out the configuration form with your webhook details:
1. Name: Type a clear name (e.g., `OnCall Platform Webhook`).
2. Method: Select `POST`.
3. Raw URL: Paste the Webhook URL you copied in Step 1.
4. Authentication: Leave this as `NONE`.
Under the Custom Request Headers section, click Add Header:
* Header Name: `Content-Type`
* Header Value: `application/json`
Under the Payload section:
1. MIME Type: Select `application/json`.
2. Paste the following VTL-formatted JSON into the text area:
JSON
```
{
"incident_name": "${latestEvent.displayName} – ${latestEvent.node.name}",
"severity": "${latestEvent.severity}",
"description": "${latestEvent.summaryMessage}",
"app_name": "${latestEvent.application.name}",
"node_name": "${latestEvent.node.name}",
"event_id": "${latestEvent.id}",
"event_guid": "${latestEvent.guid}",
"event_type": "${latestEvent.eventType}",
"monitor_url": "${latestEvent.deepLink}",
"policy_name": "${policy.name}",
"time": "${latestEvent.eventTime}",
"message": "${latestEvent.eventMessage}"
}
```
Under the Settings section:
1. Check the box for One Request Per Event. This ensures alerts are sent individually and not batched together.
2. Click Save.
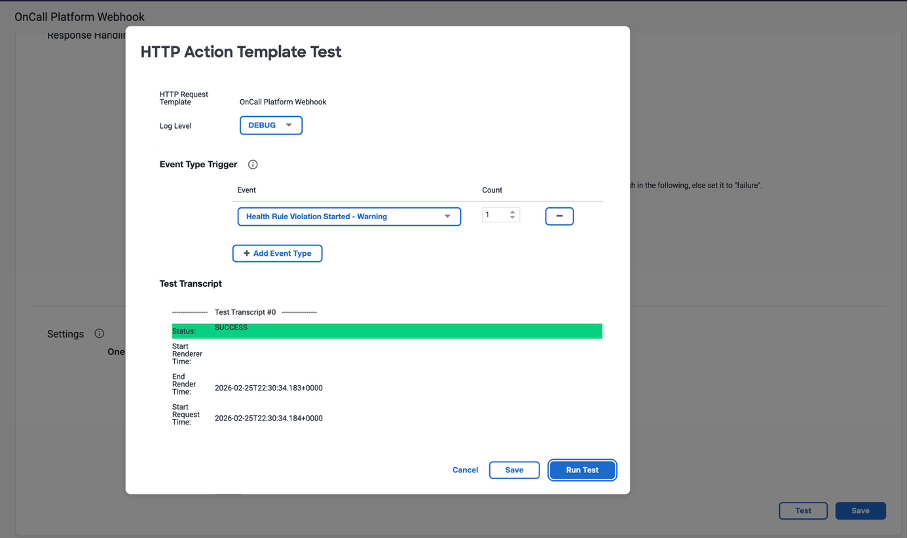
#### Step 4: Test the Template
1. Scroll to the bottom of your saved template and click Test.
2. Click Add Event Type and select an event like Health Rule Violation Started - Warning.
3. Click Run Test.
4. A green SUCCESS status indicates the payload was successfully delivered to your platform.
#### Step 5: Create an Action
After testing the template, you must save it as an executable Action.
1. Go back to the Alert & Respond menu and click Actions on the left sidebar.
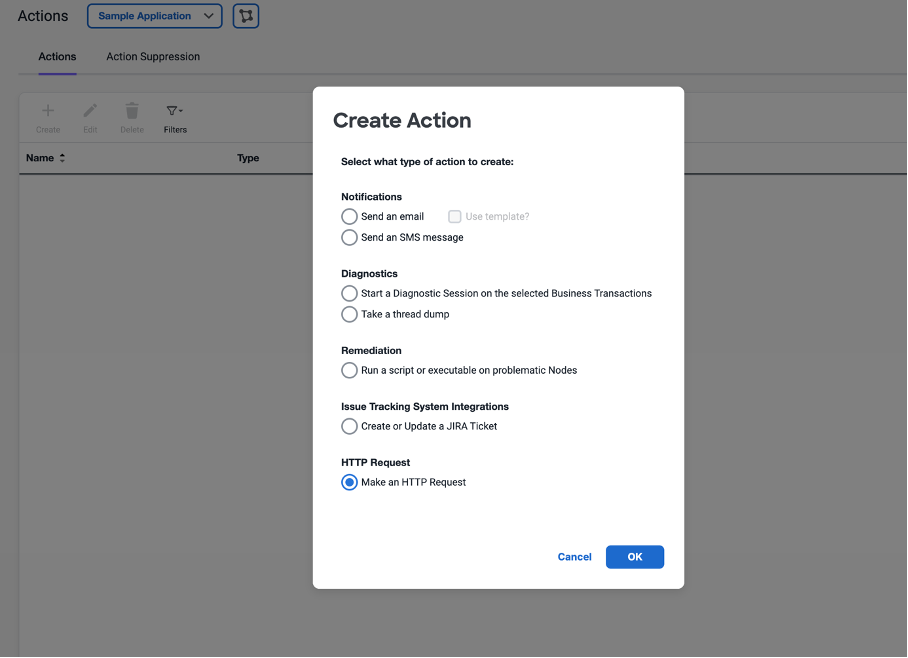
2. Click Create Action.
3. Select Make an HTTP Request and click OK.
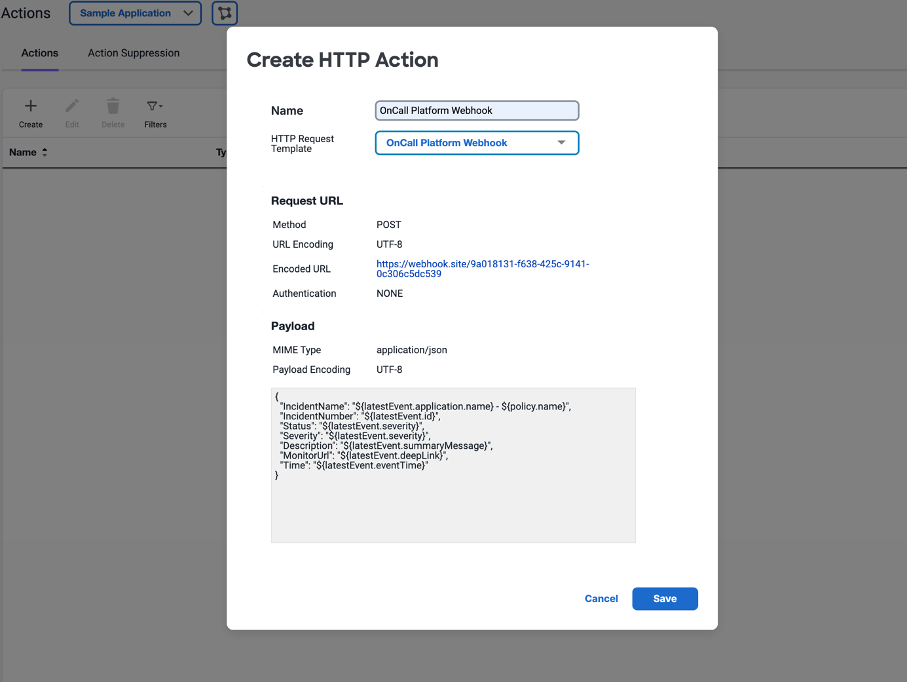
4. Name: Type a name for this action (e.g., `OnCall Platform Webhook`).
5. HTTP Request Template: Select the template you created in Step 3 from the dropdown menu. The URL and Payload will auto-populate.
6. Click Save.
#### Step 6: Link the Action to a Policy
To automate the webhook, you need to attach this Action to a monitoring Policy. When the policy triggers an alert, it will execute the webhook.
1. In the Alert & Respond menu, click Policies.
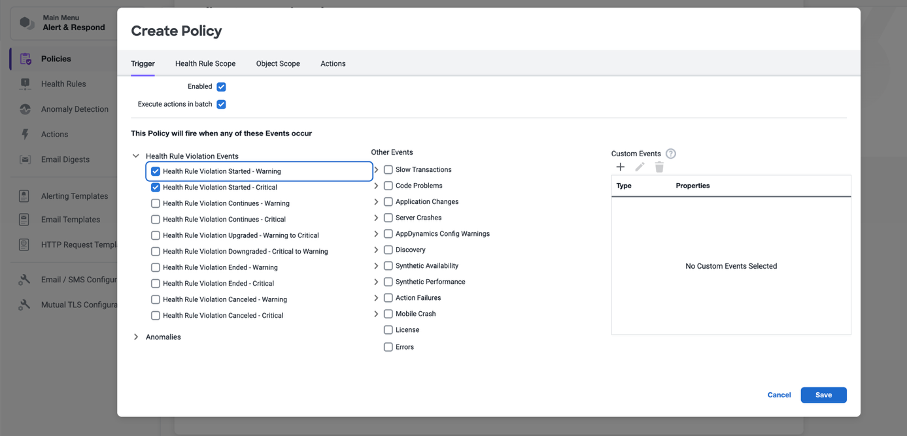
2. Click Create Policy. *(If a setup wizard appears, click Create Policy Manually under Quick Links).*
3. In the Trigger tab, define which events should trigger the alert. For example, check the boxes for Health Rule Violation Events (Warning, Critical, etc.).
You should choose;
* Health Rule Violation Started - Critical
* Health Rule Violation Started - Warning
* Health Rule Violation **Ended** - Critical
* Health Rule Violation **Ended** - Warning
4. Go to the Actions tab at the top.
5. Click the + button to select an action. Choose your newly created `OnCall Platform Webhook` action and click Select.
6. Click Save to activate the policy. You will now see your active policy properly linked to the webhook action.
***